Friday, 30 December 2011

Taking a break from Christmas festivities ...


Phew, I’ve taken a break from Christmas festivities and over eating to get back on to the crafty band wagon for the avo.  Following on from making my cushion cover and hoping to come across a piece of Cabbages and Roses fabric to sew on to the front, I’ve relented and accepted the sad fact that I will never come across what I want being sold for a pittance so …. Improvise!  I have created a patchwork square and stitched that to the front, not quite what I envisaged but lovely all the same :)
Remember me?
Patch working.
All made :)
Dib's testing it for comfort !

Saturday, 24 December 2011

'Twas the night before Christmas ...

'Twas the night before Christmas, when all through the house
Not a creature was stirring, not even a mouse;
The stockings were hung by the chimney with care,
In hopes that St. Nicholas soon would be there.


Merry Christmas one and all ♥

My lil lads Christmas lantern
(jam jar, tin foil, ribbon and the all important candle,
bish, bash, bosh)

X X X X


Friday, 16 December 2011

‘Attempts’ at candle making …

After wanting to try candle making for way too long I finally got the chance and a friend and I were like a couple of kids come candle making day. 
 Sadly our attempt's were unsuccessful - disappointed :(
I thought I would blog about 'failure' so here goes …

I think this is where the blame lies for the failure, we used candle gel.  The reason for using this and not wax is because we were told that perfume and colour could be added to gel where as this couldn't be done with wax? Only trouble is gel is said to be very difficult to work with.


Boiling the gel in a 'double boiler' effect pan and glass bowl - phew, it takes an age to get to the 200o required.


Our vessel and zinc wick ready and waiting ...


Naively, these were the other vessels we had waiting to fill :/


And finally ... our candles.  To the gel we added red food colouring and essential oils.


Only problem, the wick went out as soon as it reached the candle and then would not re-light. 
Our candles are for admiring and looking at but not touching - boo hoo.

Tuesday, 13 December 2011

Hopefully cheep but chic cards ...

When ever I go out I seam to always be saying “I’ve just got to pop and buy a boy’s birthday card”, £2.00 later tot’s up to a significant amount by the end of the month.  I've decided to improvise in an attempt to give quirky cards that don't cost a fortune.


I have taken a photo of my son’s Lego characters, printed them, mounted on contrasting paper, glued on to card, and
 Vouloir

I've also ventured on to create other cards using photos ...


Hopefully cheep but chic :)

Monday, 12 December 2011

Christmas Crafty presents...

I’ve been racking my brains for a unique and different Christmas present to give that doesn’t cost a fortune.

On my travels I’ve been looking out for things to use to create a Christmas gift that is unique, pretty, and practical but that won't break the bank.  Saturday provided just this opportunity as I was lucky enough to spend the day at an auction with friends.  This was my very first experience of an auction and I’m now totally hooked, it’s like being transfixed in front of a really good live show whilst shopping all at the same time – OMG - perfect, Saturdays just couldn’t get any better!  My one and only purchase (very restrained as I was a tad scared) was a box full of assorted glass which contained two beautiful decanters – the perfect object for a present. I’ve filled them with Orange and Cinnamon luxury bubble bath (the luxury part is because it’s from Waitrose!), added ribbon and finished with a broach.
 I'm so pleased with how they look I'm very tempted to keep them all to myself  ;)

 Linked with bystephanielynn and featuring on her sunday showcase party


Sunday, 11 December 2011

Decoupage - A new lease of life to tired, old baubles.

So … after being struck down with a debilitating virus I am now slowing on the road to recovery – yippee.  Spending quality time with the sofa is beginning to get very boring so to break up the monotony I have tried my hand at decoupage. 

For this I used what ever was close to hand, being:

Old Baubles
Scraps of fabric.  Some of the pieces are my daughters old clothes which will bring back memories every year from now on.
PVA glue


I cut the fabric into small pieces using pinking shears to prevent the edges from fraying.  Coated the bauble in glue, attached the fabric then covered the whole bauble in glue.

The end result being …


A new lease of life has been given to a set of tired, old baubles.


Sunday, 4 December 2011

Black & white ...

Below is an old photo of my little lad and our beloved Poppy dog.  I was really pleased that I’d managed to capture a ‘moment’ between them but when the photo was developed, due to it being taken in front of the patio door too much light had been behind turning the pic a shade of yellow spoiling it ... or so I thought.  I didn’t want to write it off as a bad job so thought how I could make it work, then eureka!  I turned it into black and white which created a silhouette effect making the affection between then really stand out.  Moral of the story … some photos can really benefit from being changed to black and white and it's definitely worth giving it a try.


Friday, 2 December 2011

Scruffy lads on the woodwork ...

Problem ...


Long haired, scruffy lad's on the woodwork.


The solution ...


One frame, cork floor files and a sample pot of metallic paint.


... scruffy lad's are now off the woodwork and looking much more respectable ;)


Thursday, 1 December 2011

Bauble tastic ...

A very quick and easy Christmas decoration ……

Whats required: 
Baubles
Chain from any DIY store.  Mine was from B&Q and cost £1.47 a meter (I have two meters).
Crafting wire (or similar)
And something good to watch on the TV at the time of making ;)
Measure the length of the wire (mine was 200cm) then divide by the number of baubles (I had 16), the total is the distance each bauble should be spaced (mine was 12.5cm).


Then, ta, da ...


Cheep and very cheerful.

Experimenting ...

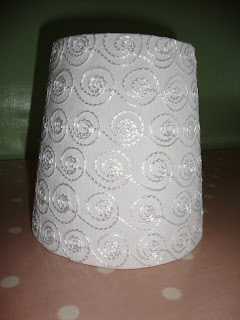
As an experiment I have painted lamp shades in emulsion to see how it looks and if it actually works?  My first attempt was un-successful as it was a plain shade so when the lamp was switched on I realised you could see the brush marks - damn!!  I then tried painting a stitched shade (from IKEA) and this has worked perfectly with no hint that it has been painted at all.  I have had it switched on for hours with no adverse effects – eureka!

I now have lamp shades that perfectly match the colour of our walls, kitchen cupboards, etc (blimey, eeeeek - how OCD am I?) so a worthwhile experiment after all.

Before ...


After ...